

Circuit - Log Book
09/11/2021
The process of first singing bowl-like structure


- - -
16/11/2021
The process of second singing bowl-like structure


-
An improvement for the tying method - The result from the left is tighter than the right one.

- - -
23/11/2021
The process of second singing bowl-like structure


- - -
30/11/2021
The second prototype of singing bowl-like structure

- - -
02/12/2021
Attaching the micro switches for the rim of singing bowl-like structure
When audience is rimming on the structure, the mallet will click the micro switches in order to trigger the sound effect. But they are too ugly, I removed them finally.


- - -
07/12/2021
The third prototype


The top view is like an entry of tunnel. Therefore, the first input is :
1. Touching the singing bowl -> Looping video turns on + Striking sfx
When audience touches the structure, his/her consciousness goes into the world of circuit via the entry.
There are some additional inputs in this temporary version :
2. Touching the mallet -> Radial lines appear + Rimming noise
3. Touching the left singing bell -> Fast radial circle appears + Short sfx from singing bell
4. Touching the right singing bell -> Slow radial circle appears + Long sfx from singing bell
The sketch :

-
When every input is activated, audience can see a subtle version of singing bowl's structure.

- - -
14/12/2021
The process of mallet
When the mallet rims on the singing bowl, the rough texture produces annoying noise and bad user experience. In this temporary version, I will pin the mallet on a plinth as one button.


- - -
21/12/2021
Drill the holes for pinning the structures on the plinth


- - -
04/01/2022
One of the new inputs
This structure is referenced the singing bell from Tibet.


- - -
05/01/2022
Set up the singing bell's structures on the plinth


- - -
06/01/2022
The final test for Makey Makey

- - -
10/01/2022
Connect those structures with wires and Makey Makey
This metallic circle is an extra part for the installation. Audience needs to take off his/her shoes then steps on this circle to complete the circuit in order to activate the Makey Makey ( Because most of the shoes are made on plastic, which blocks the transmission in conductive matter ). To me, I don't like this condition which hinders people's intention.


-
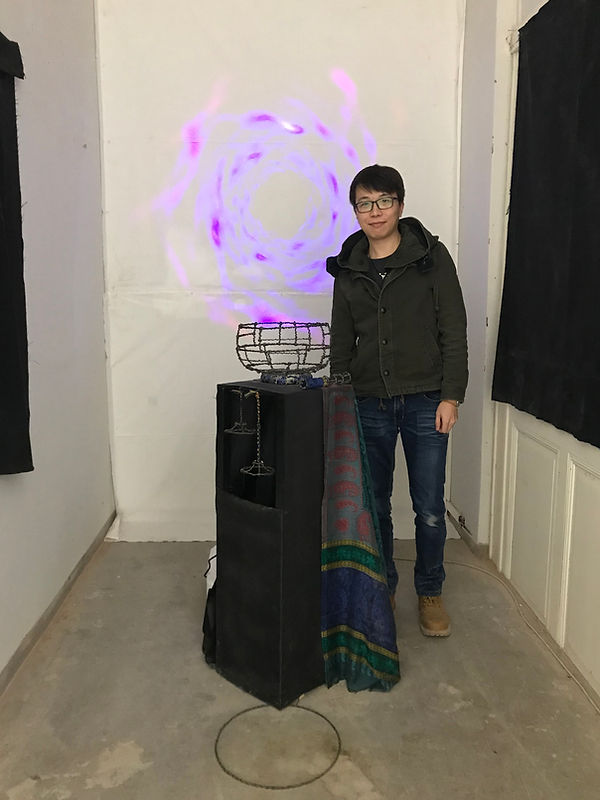
I planned the plinth could block those machines. But the projector is too big, I should select a smaller projector for the final version.


-
This kind of short throw projector, uses a rectangle lens to distort the projection, is difficult to be blocked by paper. I prefer a projector with round lens.


-
The room is too bright and the wall is too dirty. I have to use extra textile to block the light and stain. Also, the space is too narrow.

- - -
13/01/2022
Description and artist statement


- - -
14/01/2022
The whole setting


- - -
15/01/2022
The open day at Academy of Fine Arts and the audiences' participation


- - -
16/01/2022
The last day of open days' period at Academy of Fine Arts
Circuit Version 2
- - -
07/02/2022 - 11/02/2022
Preliminary storyboard


- - -
21/03/2022 - 30/03/2022
Commence the post-production
After studying the character about different Chakra, I concluded the main features as one core sentence to help me for developing the visual content of each Chakra.
Scene 1 :
Chakra 1 - The Root
My core sentence :
The entry of energy from earth and nature
The preliminary visual :

-
Scene 2 :
Chakra 2 - The Sacral
My core sentence :
The innocence explores the physical world as a magical miracle
The preliminary visual :

-
Scene 3 :
Chakra 3 - The Solar Plexus
My core sentence :
The contentment and reliability with uniform, stable frequency
The preliminary visual :

-
Scene 4 :
Chakra 4 - The Heart
My core sentence :
The emotional projection via frequency with fluctuating amplitude
The preliminary visual :

-
Scene 5 :
Chakra 5 - The Throat
My core sentence :
The aura and power for understanding and expression ( Voice )
The preliminary visual :

-
Scene 6 :
Chakra 6 - The Third Eye
My core sentence :
Reunite a complete I AM ( Self ) by experiencing all memories ( Via seeing )
The preliminary visual :

-
Scene 7 :
Chakra 7 - The Crown
My core sentence :
I AM connect with the universe to be ALL which beyond time and space ( Thought )
The preliminary visual :

-
Scene 8 :
Basic element - Particle and atom
The preliminary visual :

- - -
31/03/2022 - 12/04/2022
The post-production : Visual modification and improvement
Overall, the patterns are too simple and in a lack of details. Based on the Chakra's location and related organs, I try to add some concrete human element in every scene.
Scene 1 's human element :
Ovum, vagina
Other element :
Life, earth, concise entry
The adjusted visual :


-
Scene 2 's human element :
Sperm
Other element :
Exploration, magic
The adjusted visual :


-
Scene 3 's human element :
Nerve
Other element :
Thick and comfortable pulse
The adjusted visual :

-
Scene 4 's human element :
Heart, blood cell
Other element :
Mood, electrocardiograph, multiple thin lines
The adjusted visual :

-
Scene 5 's human element :
Uvula, throat, esophagus
Other element :
Moon, gleaming light on river ( A metaphor in "Chakra Therapy : For Personal Growth & Healing" : Its general effect is silvery and gleaming . . . as of moonlight upon rippling water. )
The adjusted visual :

-
Scene 6 's human element :
Brain texture, iris, pupil, eye
Other element :
Memory, life review, film, kaleidoscope
The adjusted visual :


-
Scene 7 's human element :
Top view of brain
Other element :
Universe, overwhelming energy, sun, black hole, void
The adjusted visual :


- - -
13/04/2022
A new idea for singing bowl's structure
I think the old version is too concrete. Therefore, this new version is using acrylic as the main material. I hope the transparency can improve the feeling about “the concept of singing bowl” instead of a concrete structure. Another problem is the whole singing bowl's structure is made on metallic wire only, that means I only can create one input on the old singing bowl's structure. In the new design, I will stick thin metallic material on the acrylic which can separate those conductive materials as different inputs.
When the audience steps on the lower structure without wearing shoes then touches the metallic part on the upper structure, a circuit can be formed in order to trigger the functions from the coding via Makey Makey.
p.s. Taking off the shoes is too annoying, so I have changed this method after laser cut.

-
The side view of upper part :

-
The top view of upper part :

- - -
25/04/2022
Production
Laser cutting.


-
Build a wooden plinth for the singing bowl's structure then attach a micro switch on it.


-
This is the trigger for rotating in order to click the micro switch.

- - -
26/04/2022
The bottom of singing bowl's structure


- - -
27/04/2022
Combine the whole structure with conductive material
I stick two thin strips of copper on the middle ring. One strip is for ground function from Makey Makey, another strip is for hacking the keyboard via Makey Makey. Audience can use one finger to trigger the ground and keyboard function. This setup can avoid the audience takes off his/her shoes to form the circuit in order to trigger the Makey Makey.


A test about this set-up.


-
Then I combine the middle and bottom.

- - -
28/04/2022
The ring of top is also been sticking two thin strips of copper

- - -
29/04/2022
Combine the whole singing bowl's structure


-
Attach the wires to the strips of copper on the ring from the top. Makey Makey can transfer the signal to the computer via the conductive material ( Wire and copper ).


- - -
30/04/2022
Setting up
Connect the wire to the micro switch.


-
Fix an extra ring in the center to improve the feeling about the bottom of singing bowl.


-
Use four nails to fix the structure's position.


-
The correct traditional usage is rimming the singing bowl clockwise. Therefore, I restraint audience, they only can rotate the trigger clockwise.
- - -
01/05/2022
An attempt on the ultra short throw projector


The projector can provide very high resolution but I cannot frame the projection by using paper because of the rectangle lens.


- - -
02/05/2022
The final set-up


-
The computer, Makey Makey and those wires are concealed inside the plinth.

-
This type of projector with round lens is able to use paper to frame the shape of projection.


- Thanks for watching -